
In case you are in search of data on the best way to regulate the entrance derailleur on a mountain bike, know that you’re not alone! A entrance derailleur is a mechanism that helps your bike shift chains or you’ll be able to say change the gear. It’s current on bikes which have a couple of chainring. You will see that a variety of fashions of entrance derailleurs however all of them have the identical operate and design.
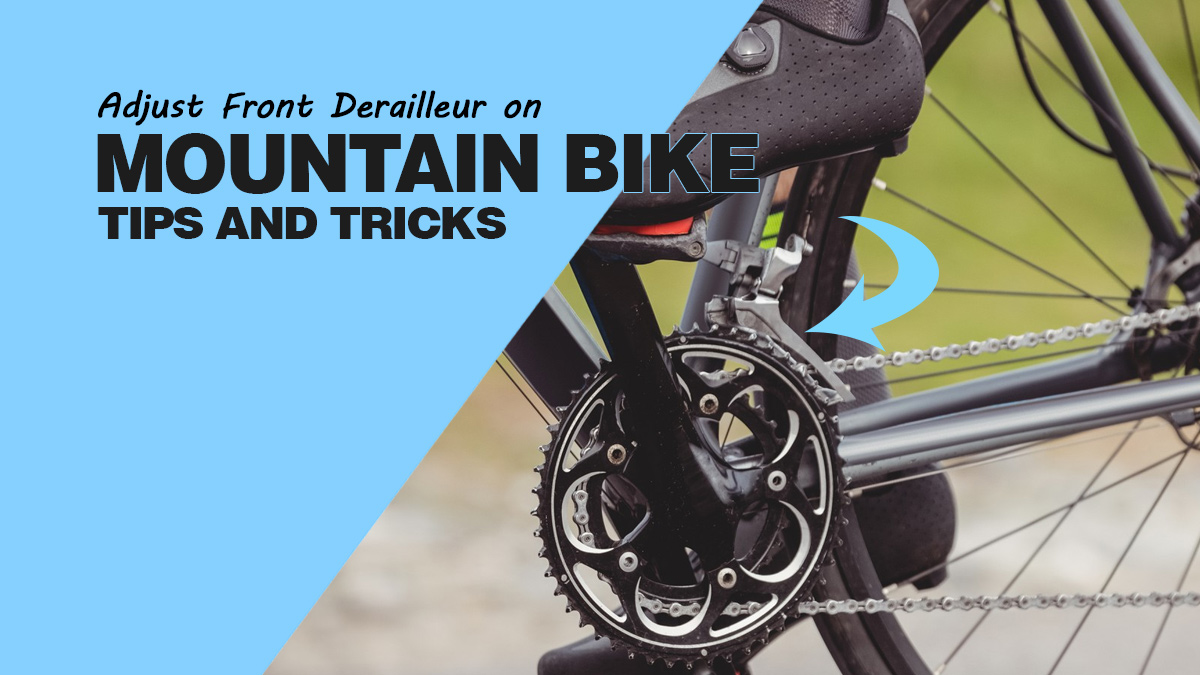
Though it is possible for you to to trip your bike with no entrance derailleur with no issues, you will be unable to shift gears within the entrance wheel. You could find your bike’s entrance derailleur on the seat tube of your bike. However, when you’ve got a mountain bike and are dealing with issues with the chain shifting, it’s time to regulate your entrance derailleur.
The precise instruments and gear make all of the distinction. With the suitable instruments in your palms, you’ll be accomplished with adjusting your entrance derailleur very quickly. Here’s a guidelines:
- A Bike Stand
- Hex Wrenches
- Cable Housing Cutter
- Pliers
- Lubricant

Adjusting The Entrance Derailleur On A Mountain Bike- Simple Steps
Let’s break down the steps to adjusting your entrance derailleur.
Step 1: Making ready The Bike
Put your bike on a motorbike stand. This can make issues a lot simpler so that you can handle. Earlier than you started adjusting additionally take into consideration the vary of gears that you’ve got within the again. It could be something between 5-12 gears.
Shift The Rear And Entrance Derailleur
Now shift your rear derailleur to the smallest cog in your bike. This can assist in decreasing the stress on the chain and make it simpler so that you can make changes. Now additionally shift your entrance derailleur onto the smallest chainring.
Test For Cable Stress
You may also need to verify for any cable rigidity. You are able to do this by pulling the derailleur cable gently. The cable shouldn’t be overly tight or unfastened. In the event you really feel that the cable is overly unfastened, you need to use the pliers to repair it.
Alter The Restrict Screws
Test your restrict screws to guarantee that they don’t want any adjustment. What you ought to be in search of is that the high-limit screws restrict the chain to shifting to the most important ring whereas the low-limit screws forestall the bottom chainring shifting.
Inspecting Your Chain And Chain Ring
Search for any injury or put on and tear. The issue could be in your chain too. A worn-out chain is tough to shift. In the event you examine any injury, it’s time to get a brand new chain/chain ring.

Step Two: Derailleur Alignment
As soon as your bike is all set, it’s time for the alignment of the derailleur.
Inspecting The Two Variables
This course of will begin with the inspection of two variables of a derailleur mounting. Primary is the cage top over the chain and the opposite is the cage rotation relative to the chainrings. It’s best to verify the peak with the decrease fringe of the outer cage immediately on high of your largest ring. Pull the cable of yours to line up these two.
If it’s a must to regulate the peak, additionally have a look at the cage rotation. It’s most possible that each will should be adjusted. This fashion, it can save you a while.
Adjusting The Cage
The closest distance between the bike’s tooth and the added entrance derailleur cage shouldn’t be above 3 mm. In case your cage is just too excessive, the chain can fall off of the most important ring once you shift. However, if the cage is just too low, the chain will rub in opposition to the tooth. It may additionally begin rubbing in opposition to the following ring.
Adjusting The Peak
In case your cage top is greater than the stated restrict, you will want to regulate it. Relieve your interior wire rigidity by shifting to the bottom gear. Now loosen the clamp bolt and shift your derailleur downwards or upwards as wanted. Upon getting the prime location, tighten your bolt once more. Now verify your cage top once more.
Tip: There will probably be marks of Entrance derailleur clamps in your bike body. Use these marks for reference whereas adjusting the outer derailleur cage top.
Adjusting The Rotation
Started by shifting your chain to the outer entrance chain ring and the outermost rear sprocket. An instance of a very good rotation is when the entrance derailleur and the chain ring are parallel.
In case your derailleur must be rotated, be certain that to shift to the interior chainring. This can launch the stress on the bike’s interior wire. Loosen the clamp bolt and rotate the derailleur to convey it to the suitable place. In case your cage finish is outwards, barely rotate the derailleur physique clockwise. Whether it is too inwards, rotate the physique counterclockwise.
After you might be accomplished, Shift your chain again to the outer ring. Intently observe your alignment.
Tip: If you are adjusting your rotation, be certain that to not disrupt the peak.
Realizing Your Mounting Techniques
Producers use totally different sorts of mounting techniques. A clamp-style derailleur will assist you to regulate each the peak and rotation adjustment. Most mountain bikes normally have a clamp-style mounting bolt for the entrance derailleur. The braze-on type is normally discovered on highway bikes. This technique will even assist you to regulate the rotation together with the peak.
A excessive direct mount system solely helps restricted changes of heights. Whereas the E2 system lacks a rotation adjustment system but it surely does give you a top adjustment choice.
Tip: When you’ve got a clamp-style mounting, loosen up the mounting bolt. This can enable you to transfer it upwards or downwards as suited to you.

Step Three: L-Restrict Screw Adjustment
After you’ve adjusted your top and rotation, let’s transfer on to the L-Restrict screw adjustment. The low gear restrict screw is there to cease the derailleur from going too far outwards or too far inwards. If you end up adjusting your restrict screws, have a look at the cage and the chain.
The thought is to regulate them in such a manner that the hole between your cage and chain is minimal. We have now to regulate them to the smallest potential distance with easy shifting. However take into account that it’s a must to do that whereas avoiding a sequence rub.
Alter The L-Screw
Let’s begin by adjusting the L-Screw. You’ll have to shift the entrance derailleur to the smallest ring. If the restrict screws aren’t marked, you’ll be able to decide one and switch it together with watching the cage. The L screw will fire up some cage movement.
Now shift the rear derailleur to the most important rear sprocket. As soon as the rear derailleur begins shifting, you’ll discover that the chain and the interior cage hole will begin getting smaller.
Your textual content
Test The Shifting Cable
A good cable will create a false interior restrict. If the cable is tight, flip the barrel adjuster clockwise. Alter it to 1 or two revolutions to loosen it. Don’t fear, after we’re accomplished, we are going to convey the cable again to the place it must be.
Spin The Crank
Slowly spin the crank whereas trying from above. Tighten your L-screw to cut back the hole. Do that till the chain is rubbing in opposition to your bike cage. As soon as achieved, loosen the L-screw slowly. Loosen it till the chain is not rubbing in opposition to your bike.
Check The L Restrict
By this level, we’ve to check the L restrict. In the event you first turned your barrel adjuster clockwise, flip it again counterclockwise. Shift outward one ring. Shift again to the smallest ring. If the chain is shifting again to the smallest ring sufficiently quick, you’ve efficiently adjusted the L screw!
Our solely concern proper now could be how briskly it’s shifting inwards, we aren’t taking into consideration the way it shifts outwards. If the shifting is taking time, flip your L screw out one quarter and check out shifting once more.
What we are attempting to attain is the smallest chain-to-cage hole together with having a very good shifting. A big hole will enhance the probabilities of a sequence drop whereas shifting.
Step 4: H-Restrict Screw Adjustment
The setting for the H-Restrict screw is much like the idea of setting an L-limit screw. The distinction is that right here we need to cut back the hole between the outward cage and chain. Right here a big hole implies that the chain will fall off the most important ring throughout a shift.
It may be complicated to adust a high-gear restrict screw. It’s because the spring in your derailleur physique will continuously pull the derailleur inward. To check the outer restrict screw adjustment, use your shift levers to continuously apply strain outwards.
Shift The Chain
Begin by shifting the chain to the smallest rear cog. Word that doing this will even transfer the chain outwards on the entrance finish. You’ll have to shift to the most important entrance chain ring. If the chain is just not shifting, the cable will probably be extraordinarily unfastened. Flip your barrel adjuster counterclockwise and check out shifting once more.
Tip: In case your barrel adjuster runs out of turns, rethread it again in fastidiously. You may flip it totally in after which again out a number of occasions.
Return the shifter in direction of an inward place. You may pedal to get the chain to the smallest ring. This should match the shift-lever place with the place of the derailleur. Shorten the cable on the pinch bolt.
Risk: It’s potential that your barrel adjuster unthreads fully!
If the chain doesn’t shift to the most important cog after you’ve loosened the barrel, it could be as a result of the H restrict screw is just too tight. Flip the screw counterclockwise. Give it a number of turns.
Tip: If you are adjusting your entrance derailleur, shifting your rear derailleur to the interior rear sprocket might be actually useful. It is going to reduce your chain rigidity and make the adjustment somewhat simpler.

Adjusting The H-Restrict Screw
As soon as you might be on the most important ring, loosen the H-Restrict screw. That is accomplished deliberately. Put additional strain in your shifter. There ought to be a niche between your chain ring and the cage which signifies that the H-Restrict screw is just too unfastened.
Now you’ll tighten the H-Restrict screw to cut back this hole. Start doing this by decreasing the strain on the shifter. Tight the H-screw solely as much as 1 / 4 flip.
Now apply strain on the shifter once more and verify the hole. Repeat this course of till you’ll be able to restrict the hole as much as solely 1mm.
Testing The H-Restrict Screw
Flip the crank to make sure that the chain doesn’t rub. Additionally continuously apply strain to the shifter. Shift to the smallest subsequent ring after which again outwards. That is accomplished to check the H-Restrict screw. Do that whereas urgent totally in your shifter in an effort to invigorate a very good cable setting.
Once you push on the extent, the cable set is remoted from the restrict setting. If the derailleur is unable to make the shift or the shifting is sluggish, the restrict is overtight. Once more, loosen solely as much as a one-quarter flip after which strive shifting once more.
However, if the chain shifts to the most important ring or almost goes over it, the restrict is just too unfastened. On this case, tighten solely as much as a one-quarter flip and check out once more.
Fifth- Indexing Adjustment
Index shifting is finished to position the cage in an accurate place with relevance to the chainrings. That is achieved by adjusting the bike’s barrel adjuster. Now some levers have as much as two or three positions whereas others have a number of clicks. Irrespective, the method would be the similar.
When you’ve got an index shifter however no barrel adjuster, you can also make the adjustment by adjusting the size of your cable on the pinch bolt. Shorten or lengthen the cable.
Shift The Chain
The chain needs to be on the smallest rear cog. Now shift to the most important entrance chainring. To seek out the right cable setting, you’ll have to introduce motion on the cage, after which take away it systematically. The motion on the cage will inform us whether or not the linkage is contacting the H-Restrict screw or not. When the motion is totally gone, the cable set will probably be proper.
Alter The Barrel Adjuster
Push on the lever, if you happen to discover that there is no such thing as a motion on the cage, lengthen your cable by adjusting the barrel adjuster clockwise. Now push the lever once more. Repeat this course of till you discover any motion.
As soon as the motion is there, flip your barrel adjuster counterclockwise by one-half flip. Check this by pushing on the shift stage once more. Repeat this course of till the cage is just not shifting outwards and once you push the lever. The indexing adjustment is efficiently accomplished.
Here’s a video demonstration of the entire course of:
Word: Some entrance and rear gear changes aren’t suggested by the producers. They aren’t meant to be useable. So regardless of what number of changes you make, they won’t work. On some bikes, a big to the big mixture will make the chain rub the cage. In the event you make changes to cease this, it should solely lead to extra rubs and a rise in unusable gears.
Associated: How To Take away Bike Cassette With out Particular Instruments- Bike Ideas And Methods
Ridding Issues: Might It Be Your Entrance Derailleur?
Listed below are some frequent entrance derailleur issues that you would be able to face with a wrongly adjusted entrance derailleur:
Noise
When shifting, you would possibly hear a grinding or rubbing noise. This sound is generated when the chain of the bike rubs in opposition to a sequence ring or a derailleur. On this case, both your chain is worn out or you’ve a misaligned derailleur.
Chain Drop
Your chain can fall off the sprockets if you find yourself shifting or ridding.
Problematic Shifting
In case your shifting is just not easy and you might be dealing with issues between the chainrings, it may be on account of a misaligned derailleur. It may be tough so that you can shift easily in case your derailleur is just not aligned.
Chain Not Shifting
In case your chain is just not shifting right down to the smallest chainring or it isn’t shifting as much as the most important one, then in all probability a misaligned derailleur is your wrongdoer. Nevertheless it will also be on account of a difficulty together with your cable rigidity.
Adjusting A Entrance Derailleur On Mountain Bike- Is It Mandatory?
The reply to this relies on the type of driving expertise you need to expertise. Actually, if you’re in search of simply the wheels to roll in your bike, you might be good to go with out adjusting your entrance derailleur. However if you wish to get pleasure from your bicycling journey probably the most, then you realize what it’s a must to do!
It’s a necessity for mountain bicycling fans as a result of it makes certain that the chain is shifting easily in between the chainrings. This ensures silky shifting. Your chain won’t rub in opposition to the derailleur. It is going to additionally not get caught up between the chainrings. Briefly, you’ll not need to get off your bike to make things better from time to time. As an alternative, you’ll be able to get pleasure from an uninterrupted journey in your bike.
A easy shifting will even make sure that you keep a continuing pedaling rhythm. This fashion you’ll be able to enhance your driving efficiency on steep terrains. However, a misadjusted entrance derailleur won’t deprive you of those experiences however will even trigger put on and tear to your chain and chainrings. It could additionally have an effect on your different bike parts which is usually a big downside.
FAQs
Why Is My Entrance Derailleur Not Shifting Correctly?
Your entrance derailleur may not be shifting correctly on account of numerous causes reminiscent of broken parts, chain rigidity, restrict screw adjustment, and derailleur alignment.
What Ought to I Do If My Chain Drops Whereas Shifting?
In case your chain drops whereas shifting, it could be due to a misaligned derailleur. Examine your bike derailleur alignment. Additionally, have a look at your cable rigidity. In the event you see any broken elements, you could change them to make your chain shift easily.
Conclusion
A correctly adjusted entrance derailleur is just not a need, it’s a necessity. In case you are doing it for the primary time, I extremely recommend getting it accomplished at a motorbike store first. Intently observe your entrance derailleur cage to know what you might be in search of.
Now that you understand how to regulate the entrance derailleur on a mountain bike, are you going to strive it at residence? Tell us within the feedback down beneath! Comfortable Adjusting!
Additionally Learn: Cantilever Brakes Vs V Brakes: Which One Is Higher For Your Bike